This article explains a simple end-to-end workflow in Sales Layer:
- Import 10 products
- Assign categories
- Add 1 product image
- Publish to 1 channel
By the end, you will have real items in your catalog and at least one item ready to be sent to a channel.
Before you start
Make sure you have:
- An Excel or CSV file with at least 10 products
- A basic category structure in mind, or a file ready to import categories
- One product image ready in JPG or PNG format
- Access to at least one channel, or permission to create one
Step 1: Import 10 products
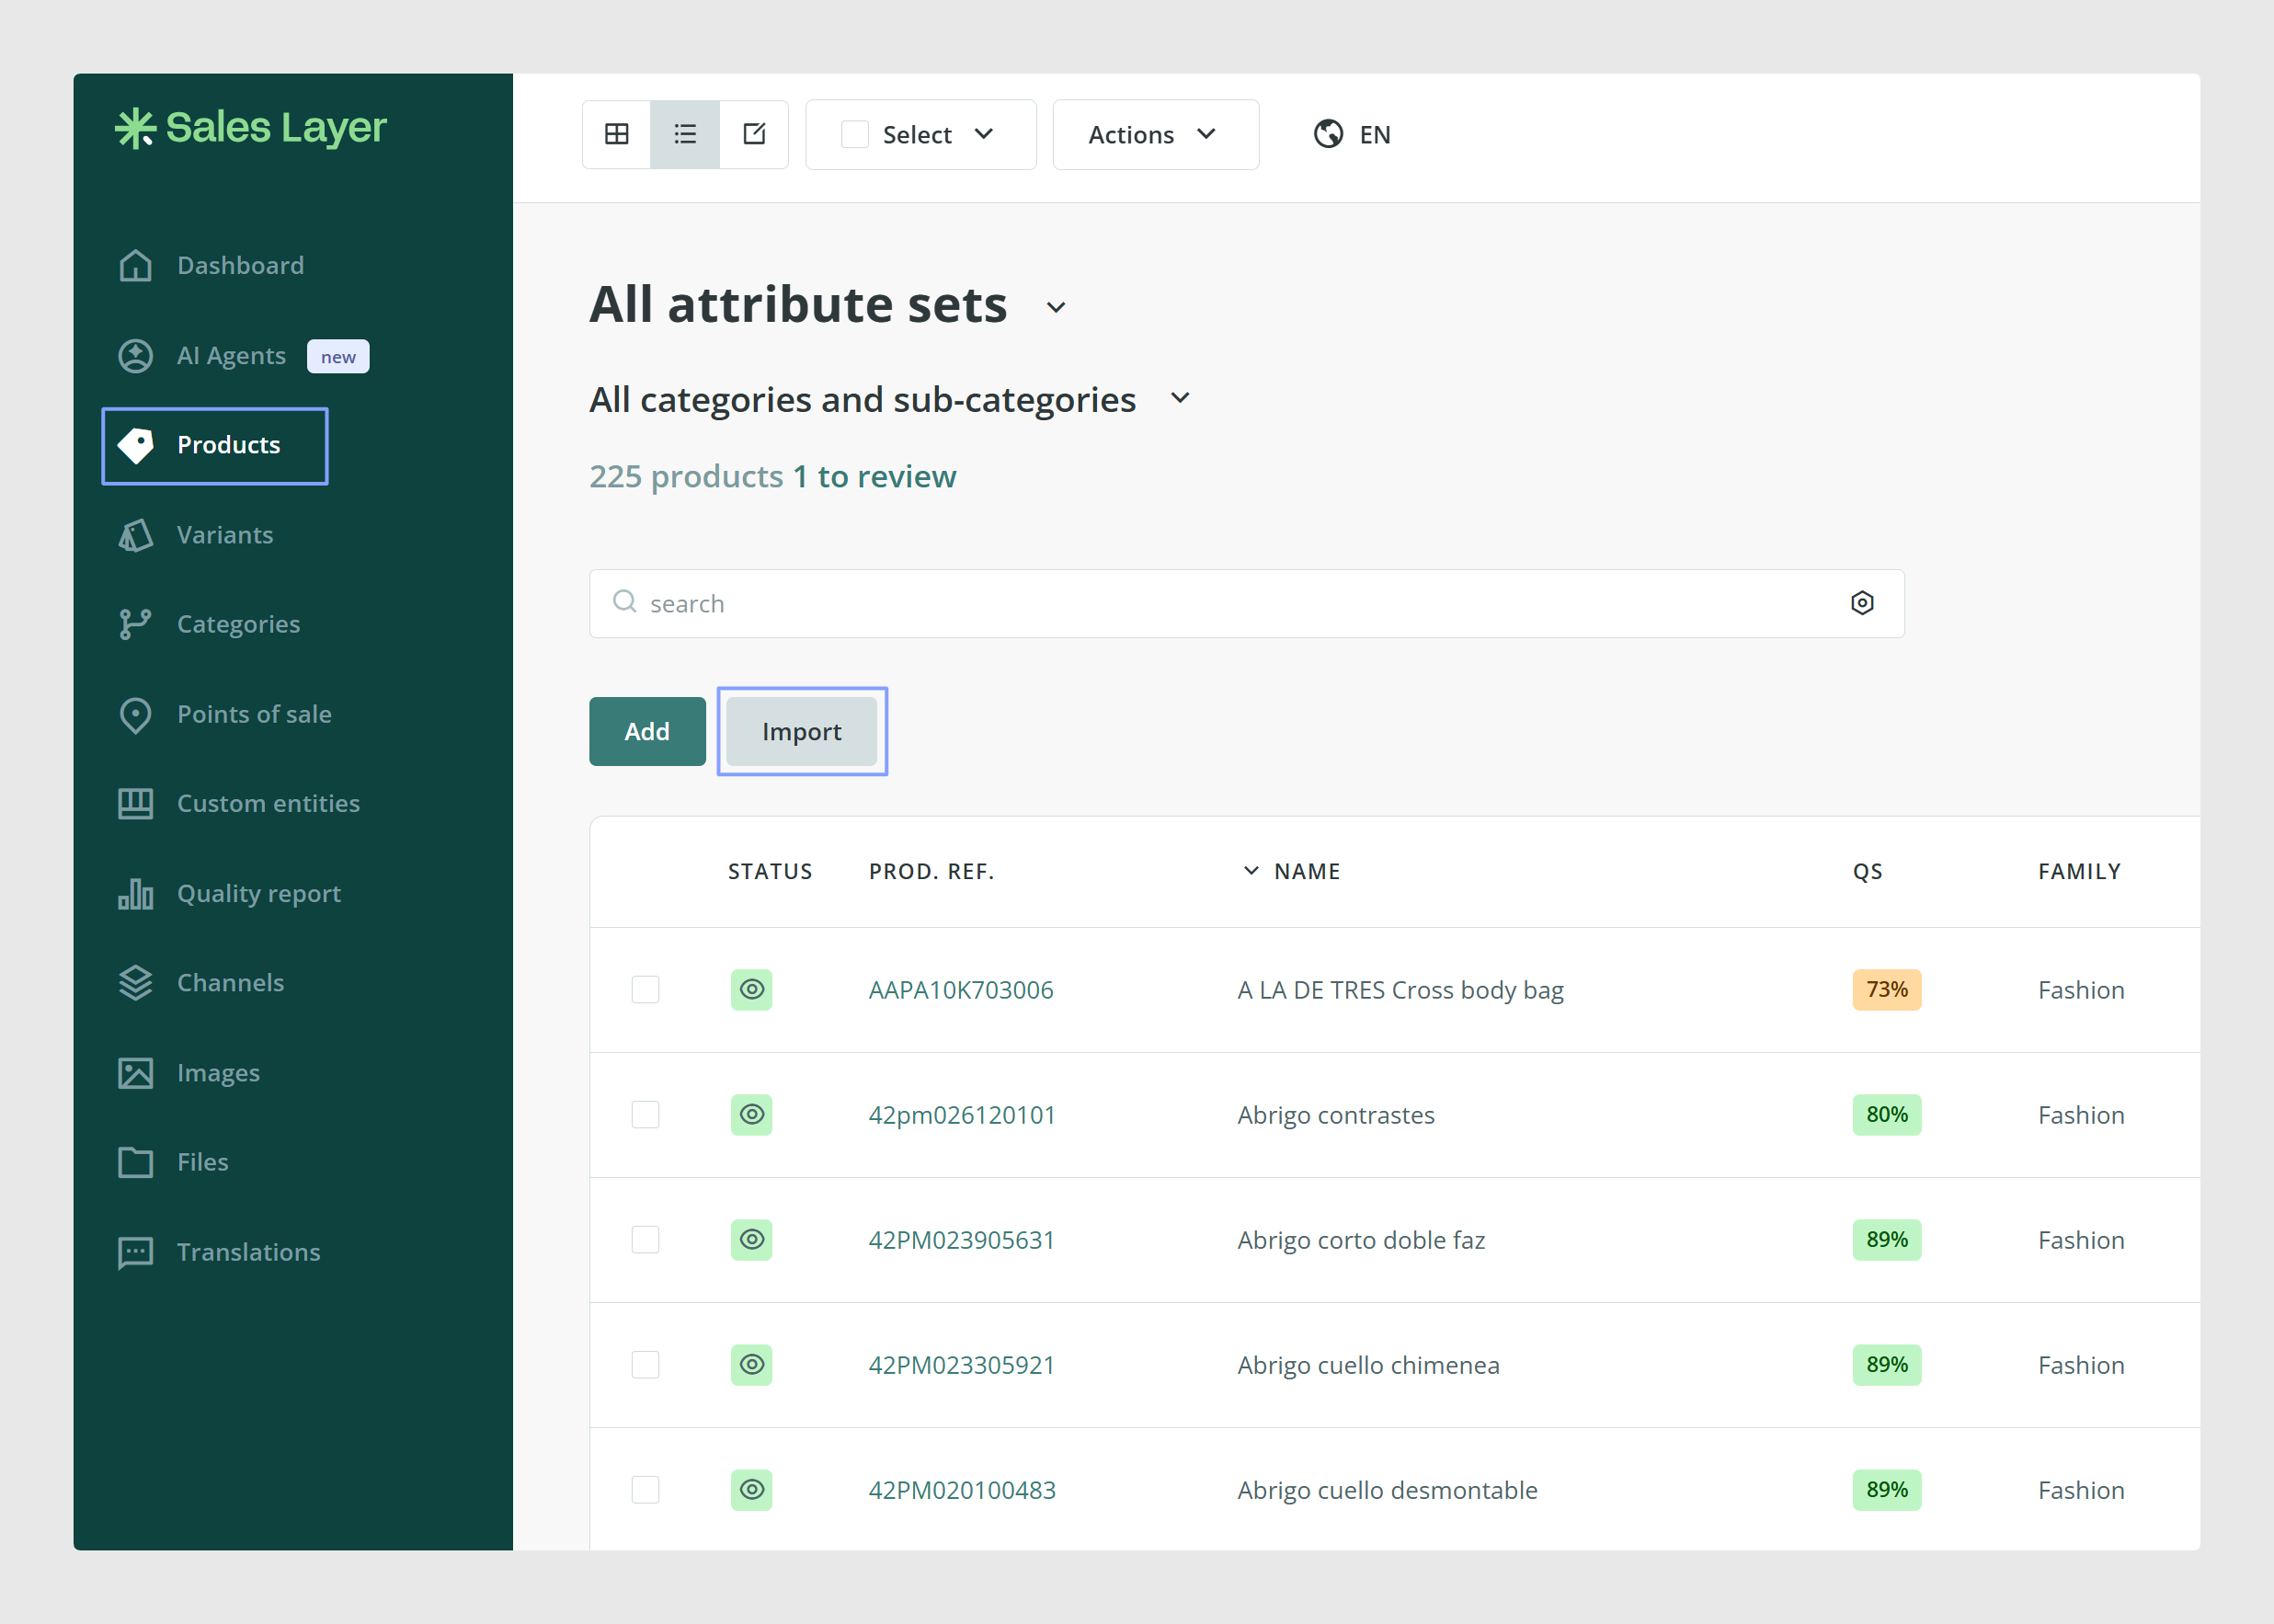
Open the Products table
From the left menu, click Products. This is where you can import, edit, and manage your product table.
Start the import
Click Import below the search bar, or go to Actions > Import products.
Upload your file and map the fields
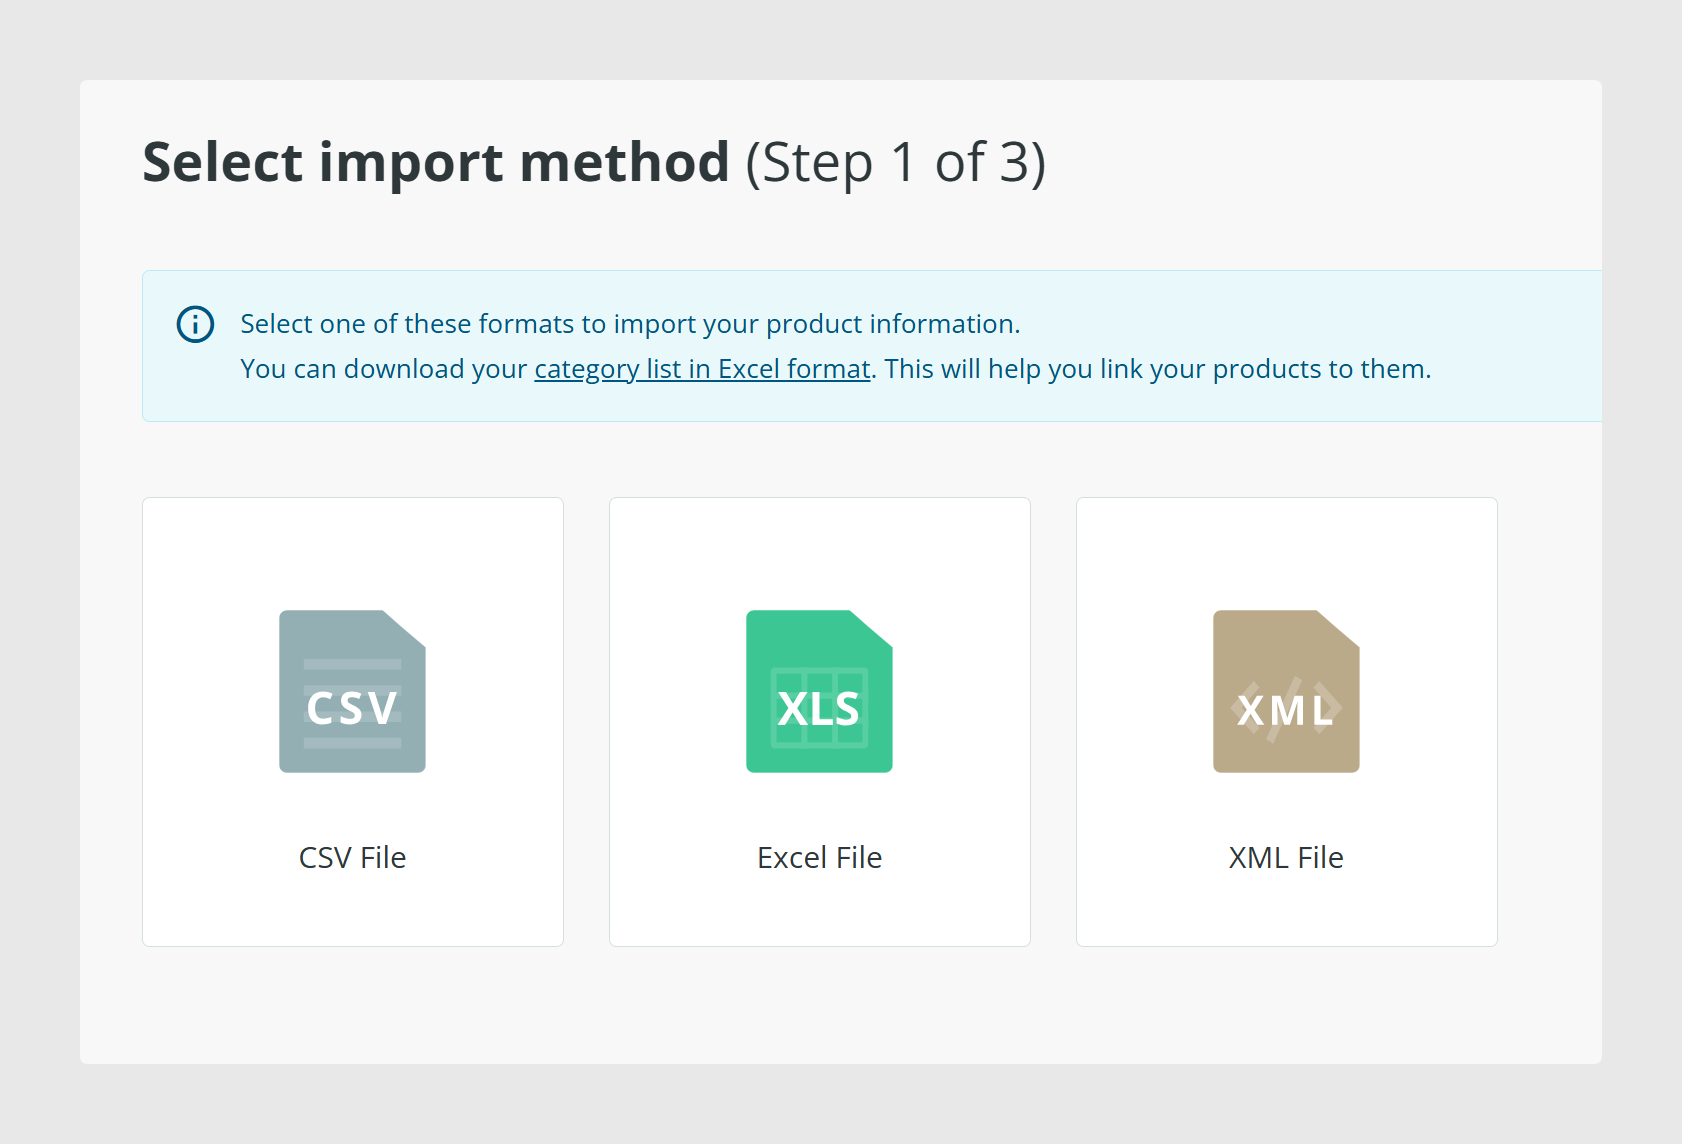
Choose your import format and upload your file. Sales Layer supports Excel and CSV for this workflow.
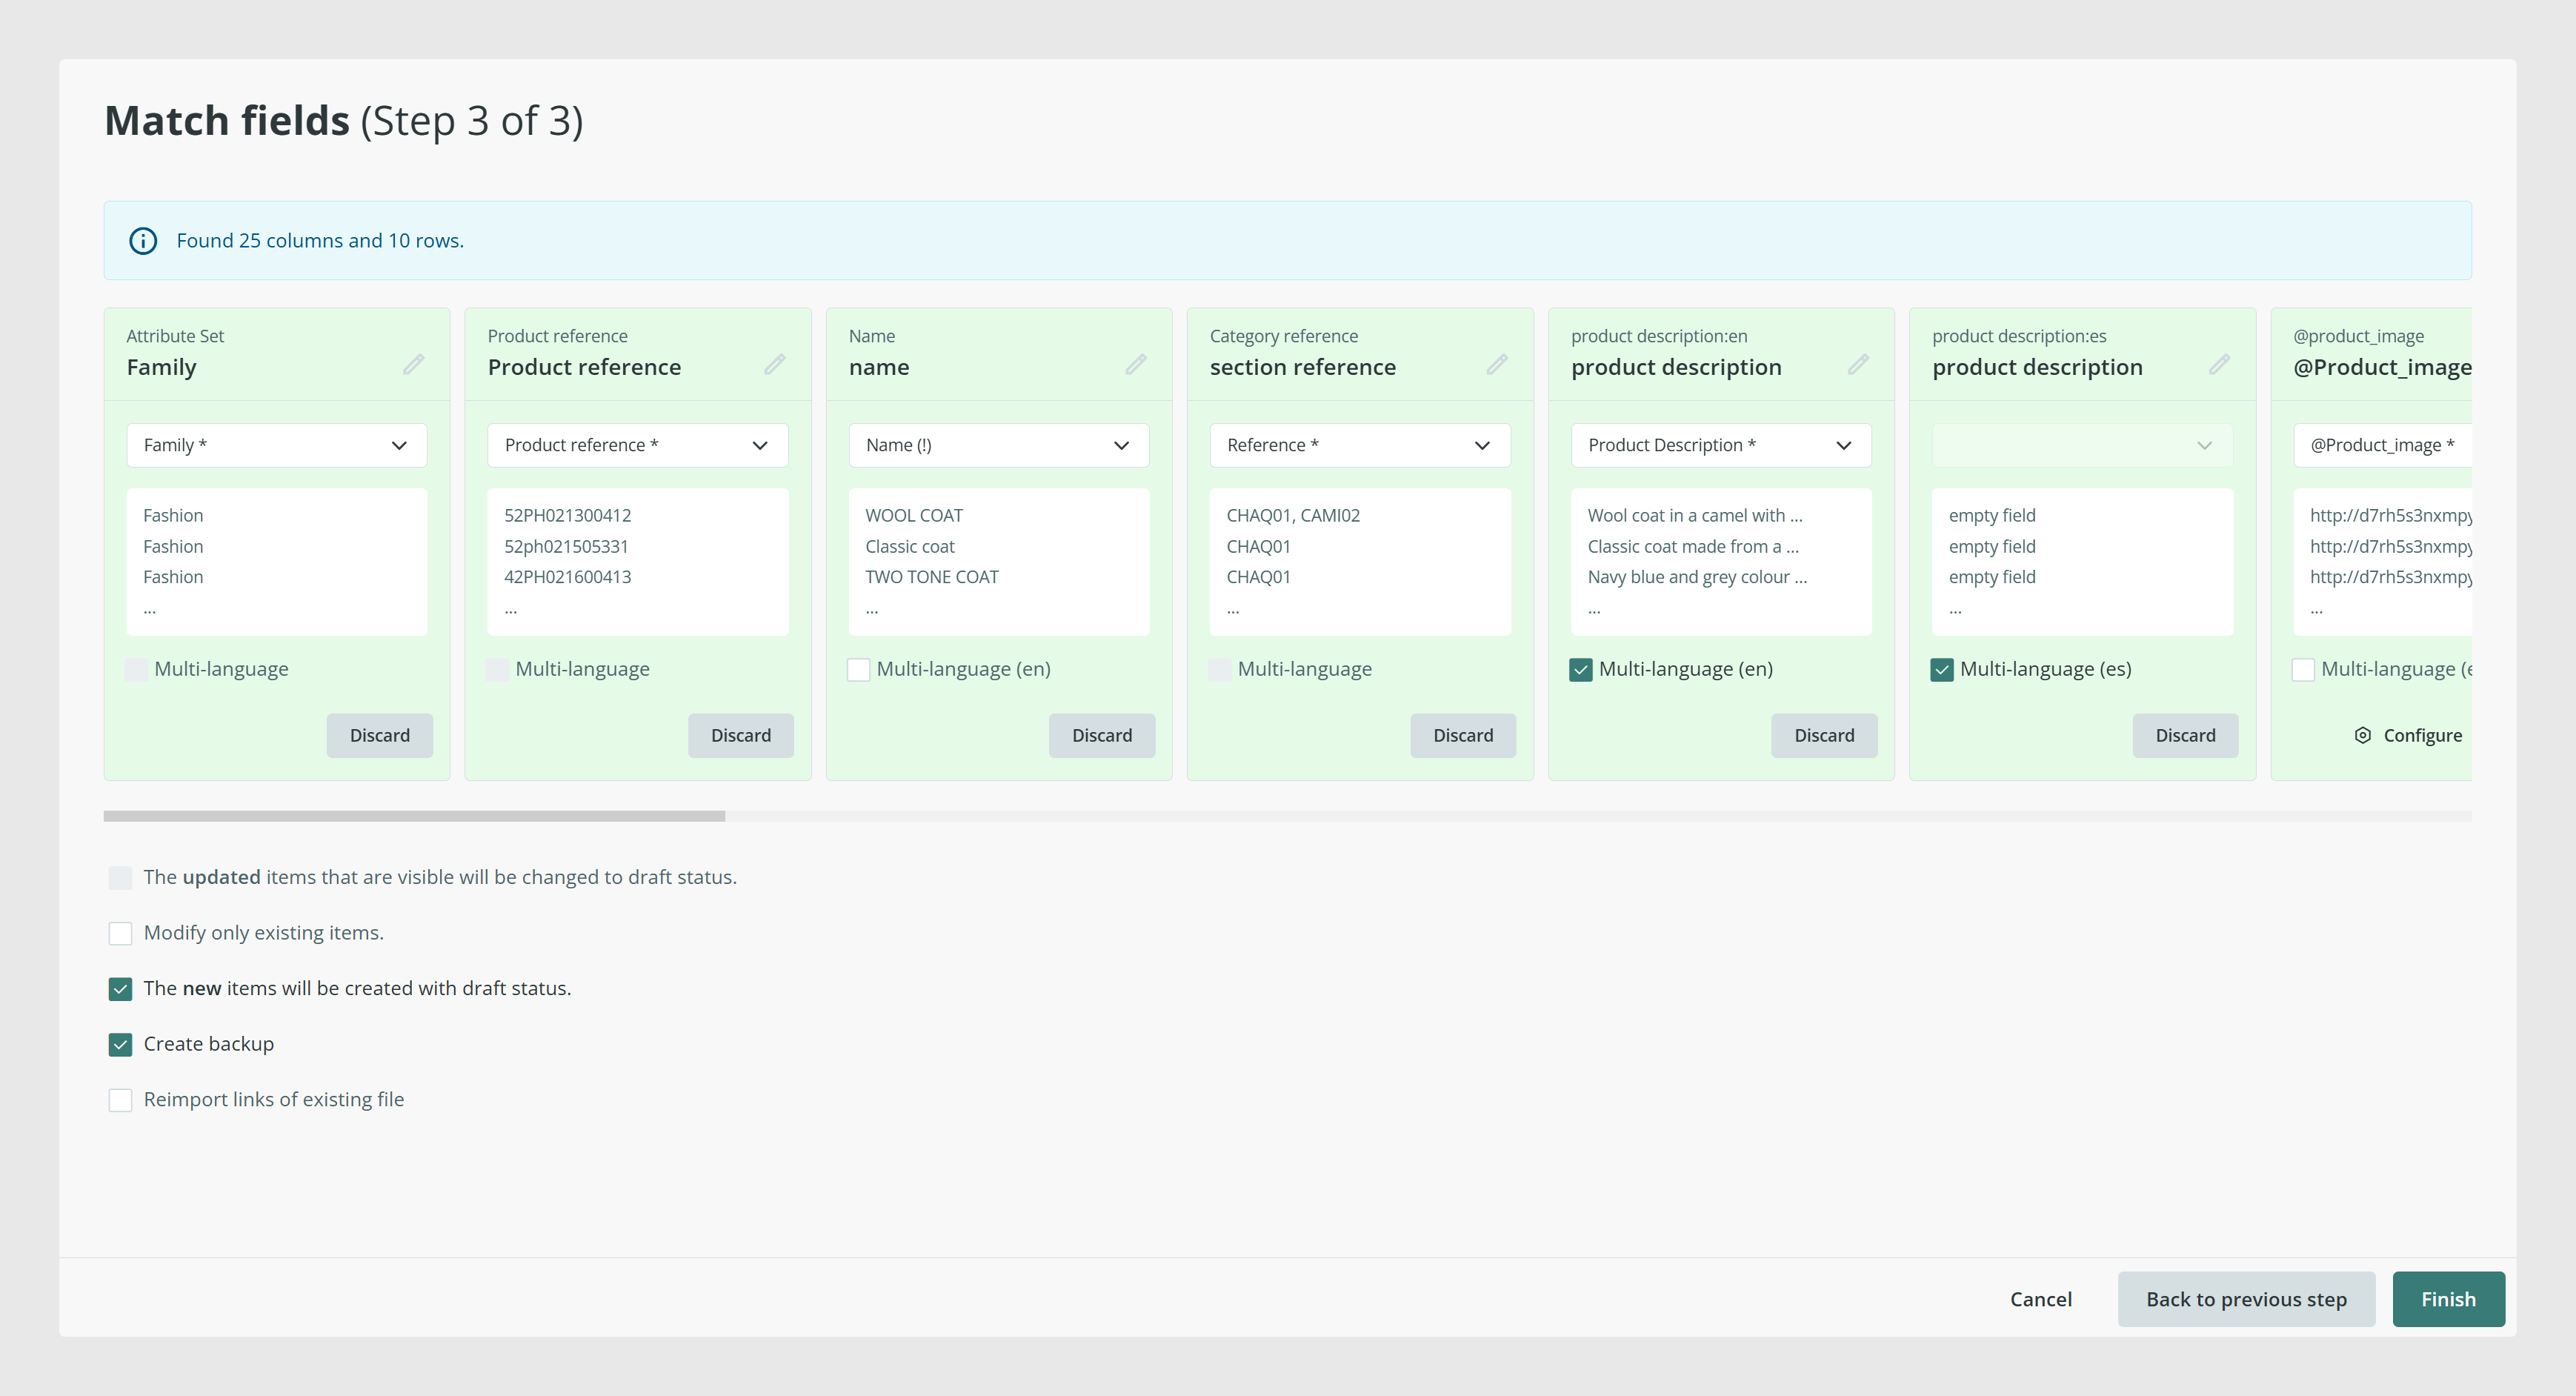
After uploading the file, Sales Layer will try to match your columns with existing fields automatically. Review the mapping before importing.
For a basic product import, make sure you include at least:
- Product Reference, which is the unique identifier
- Product Name
You can also include other useful fields such as category reference, description, attribute set, or image name.
Run the import
Once the field mapping looks correct, run the import.
If this is your first test, keep it simple. You only need enough information to create the products successfully. You can enrich the records later.
Confirm that 10 products were created
Return to the Products table and check that at least 10 products now appear in the list.
Tip: If you prefer to work with rows and columns after importing, you can switch to Edit or Excel mode to review and update several products at once.
Step 2: Assign categories
You can do this in two different ways depending on whether your categories already exist.
Option A: Assign existing categories to products
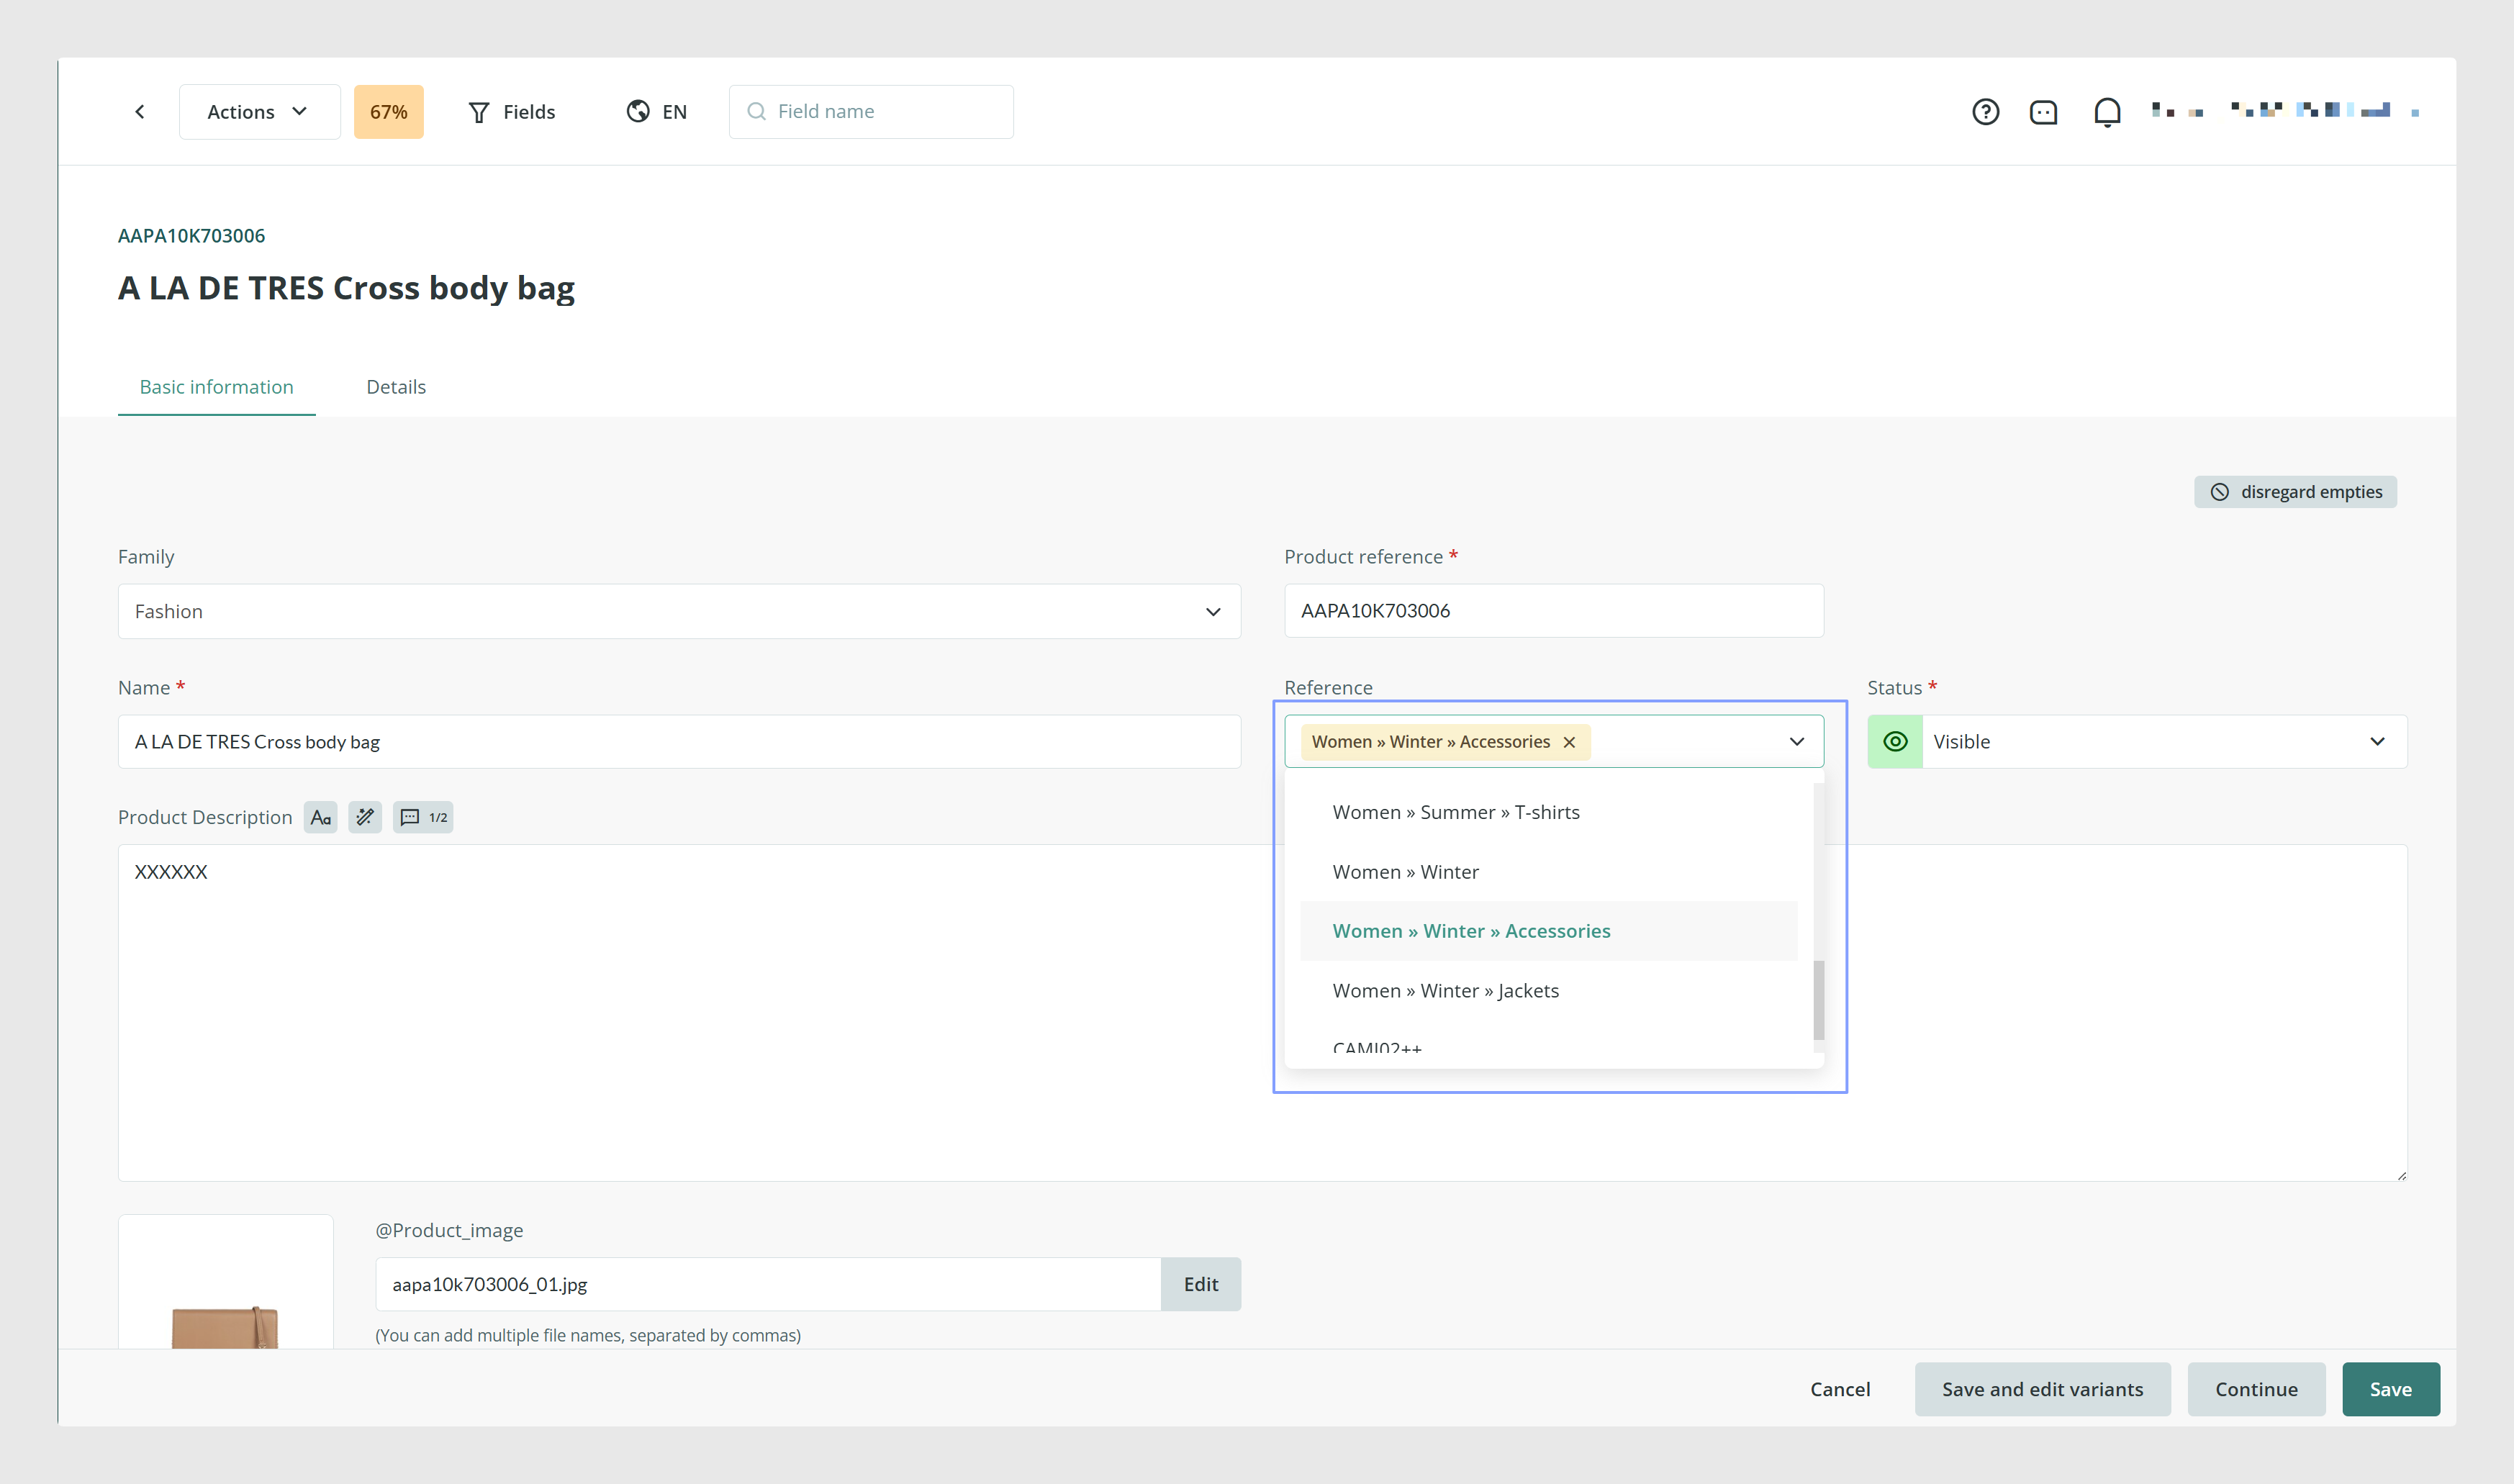
- Open one of your imported products by clicking its name.
- In the product form, locate the category field.
- Select the correct category, then save the product.
- Repeat this for a few products, or use bulk editing if available in your account.
Option B: Create or import categories first
If you do not have categories yet, go to Categories from the left menu.
From there, you can import them in a very similar way to product imports.
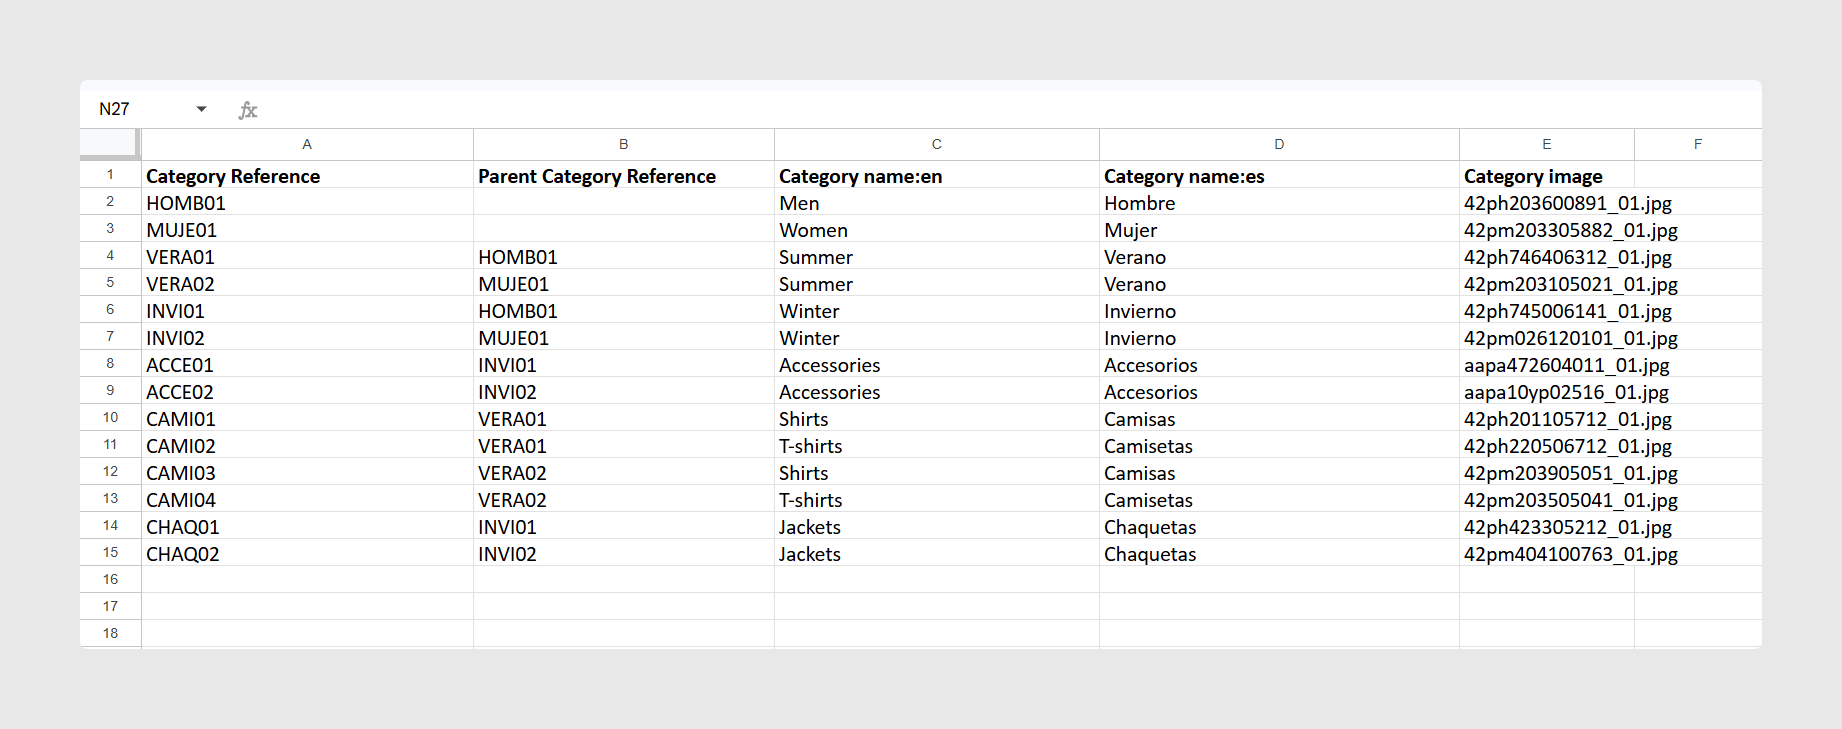
A simple category file usually includes:
- Category Reference
- Parent Category Reference, if you want a hierarchy
- Category Name
If a category has no parent category reference, it becomes a main category. If it has one, it becomes a subcategory.
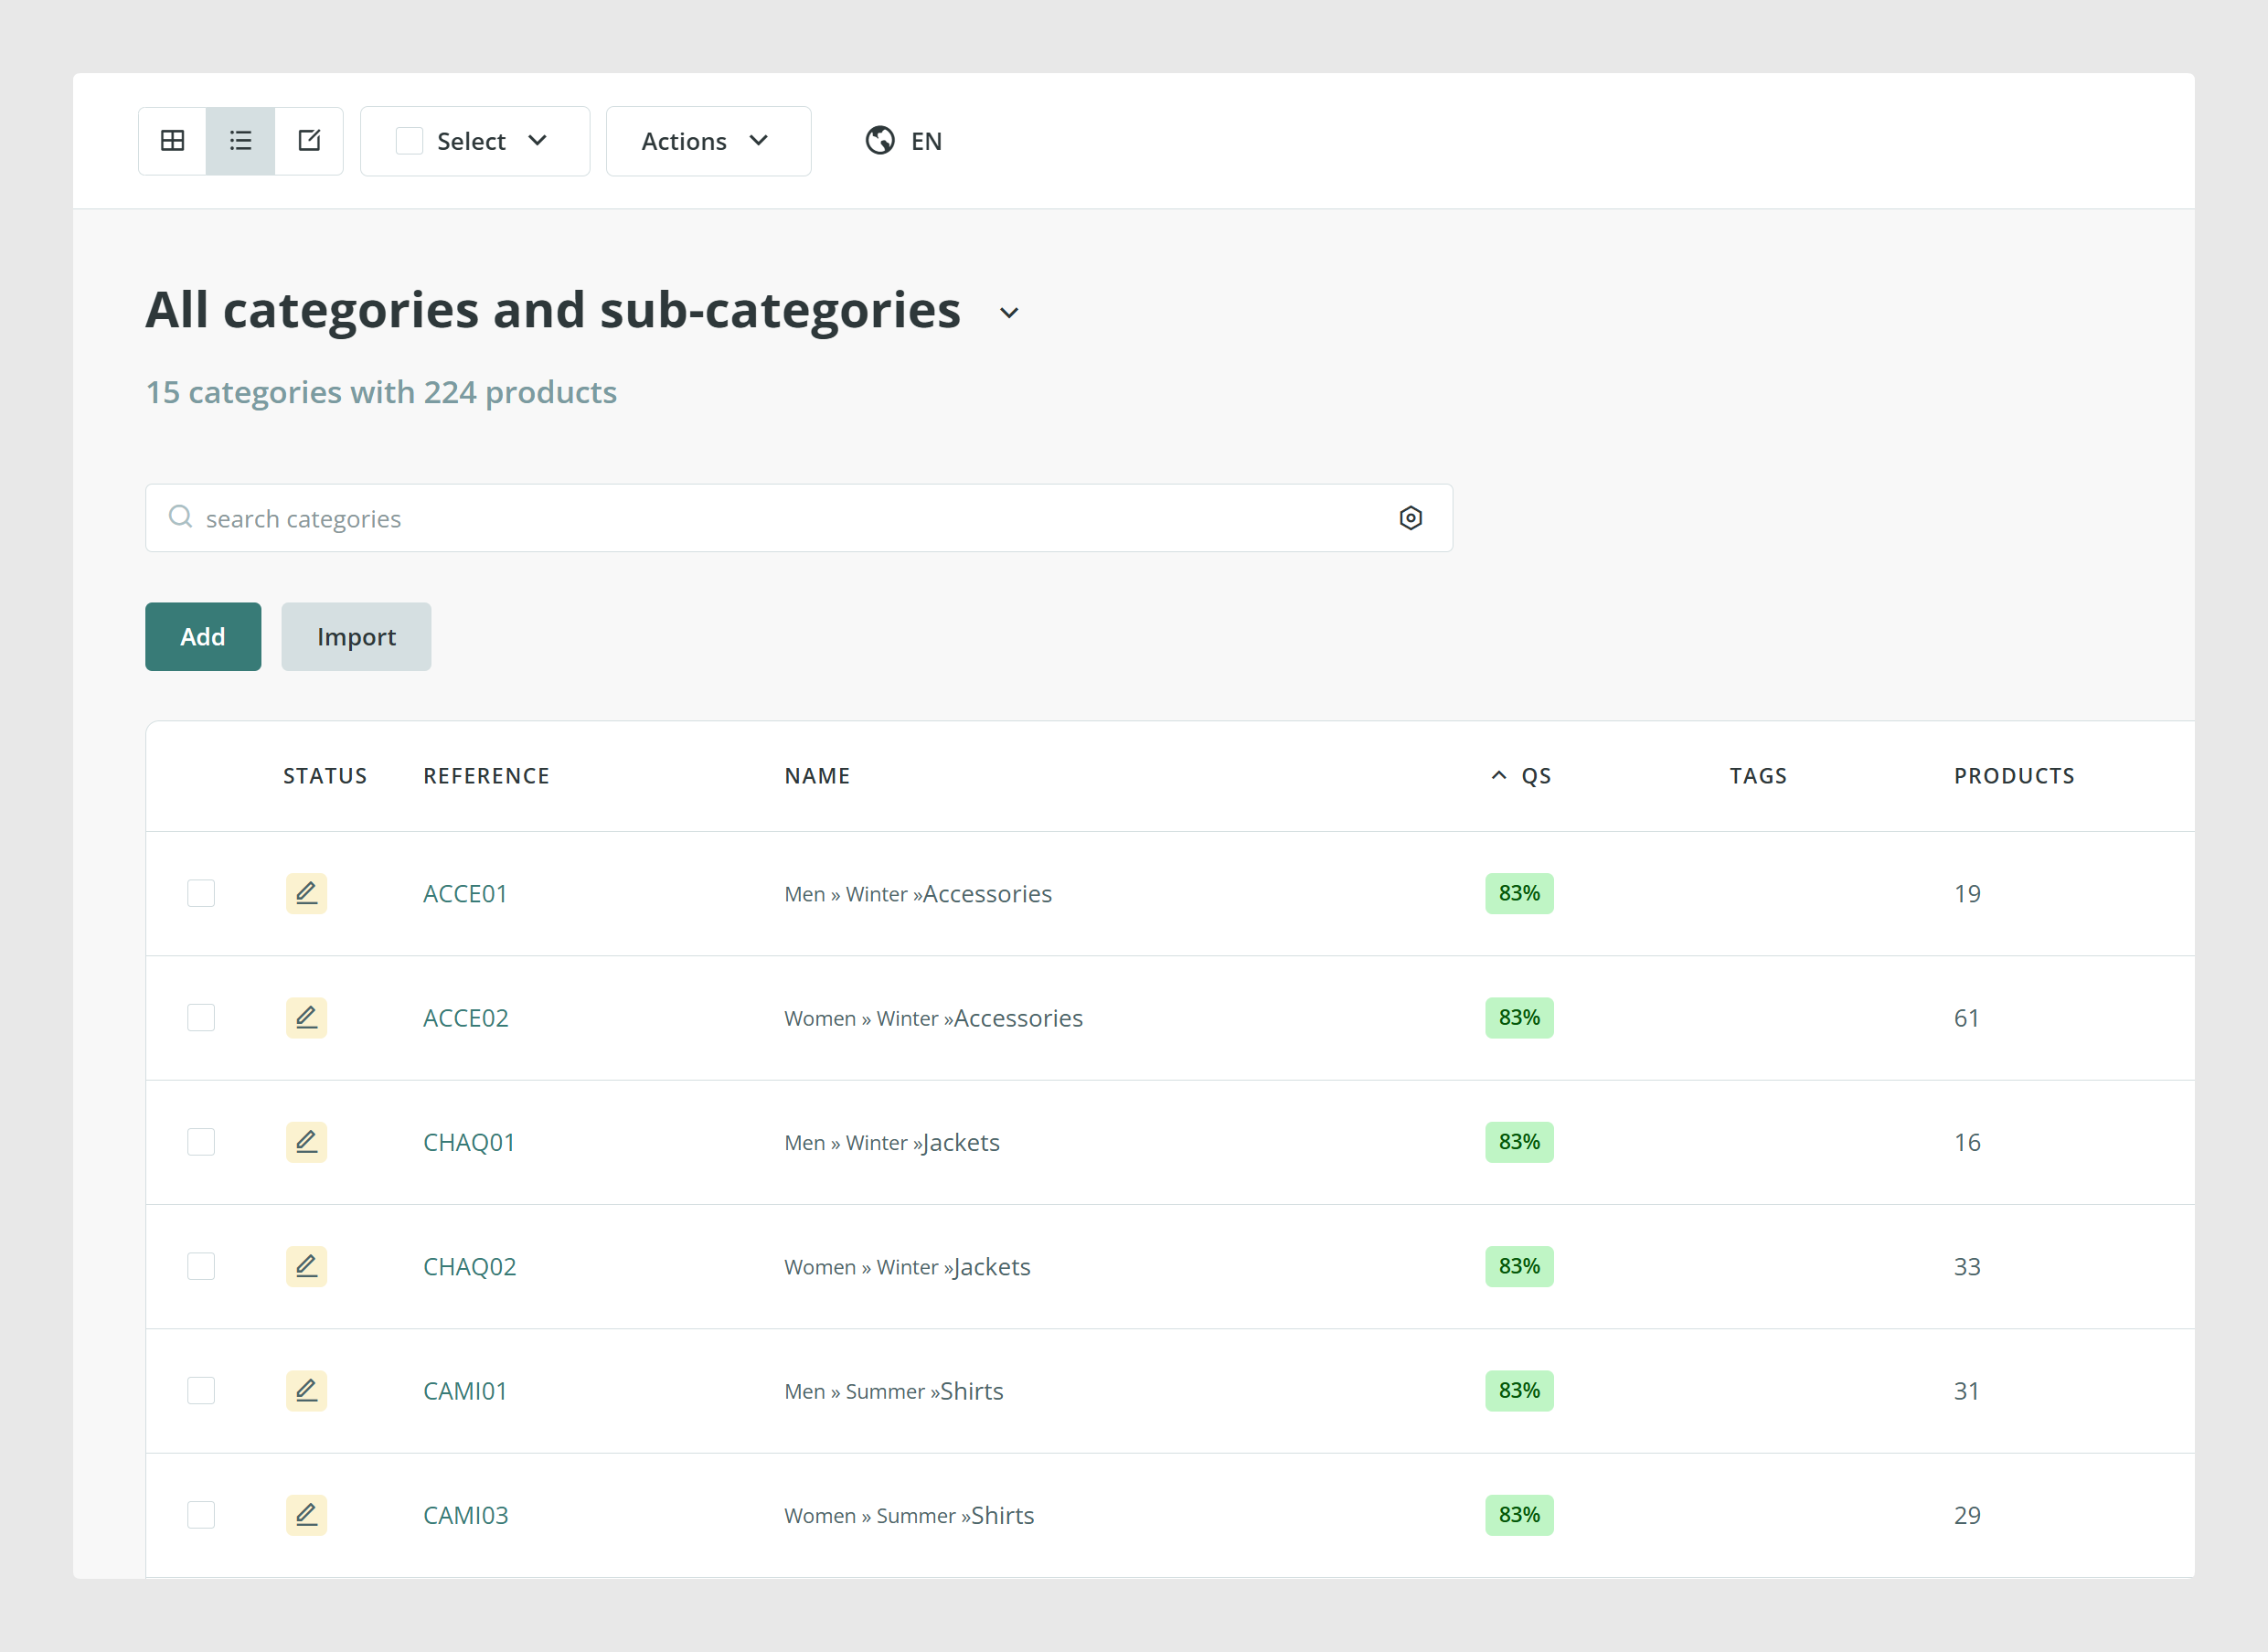
Once your categories are available, go back to Products and assign them to the products.
Tip: Categories can also be linked during product import if your file already includes the category reference.
Step 3: Add 1 image to a product
Open one of the products you imported.
Look for an image field such as Image, Main Image, or Product Image.
Use the field controls to upload the image from your computer, then save the product.
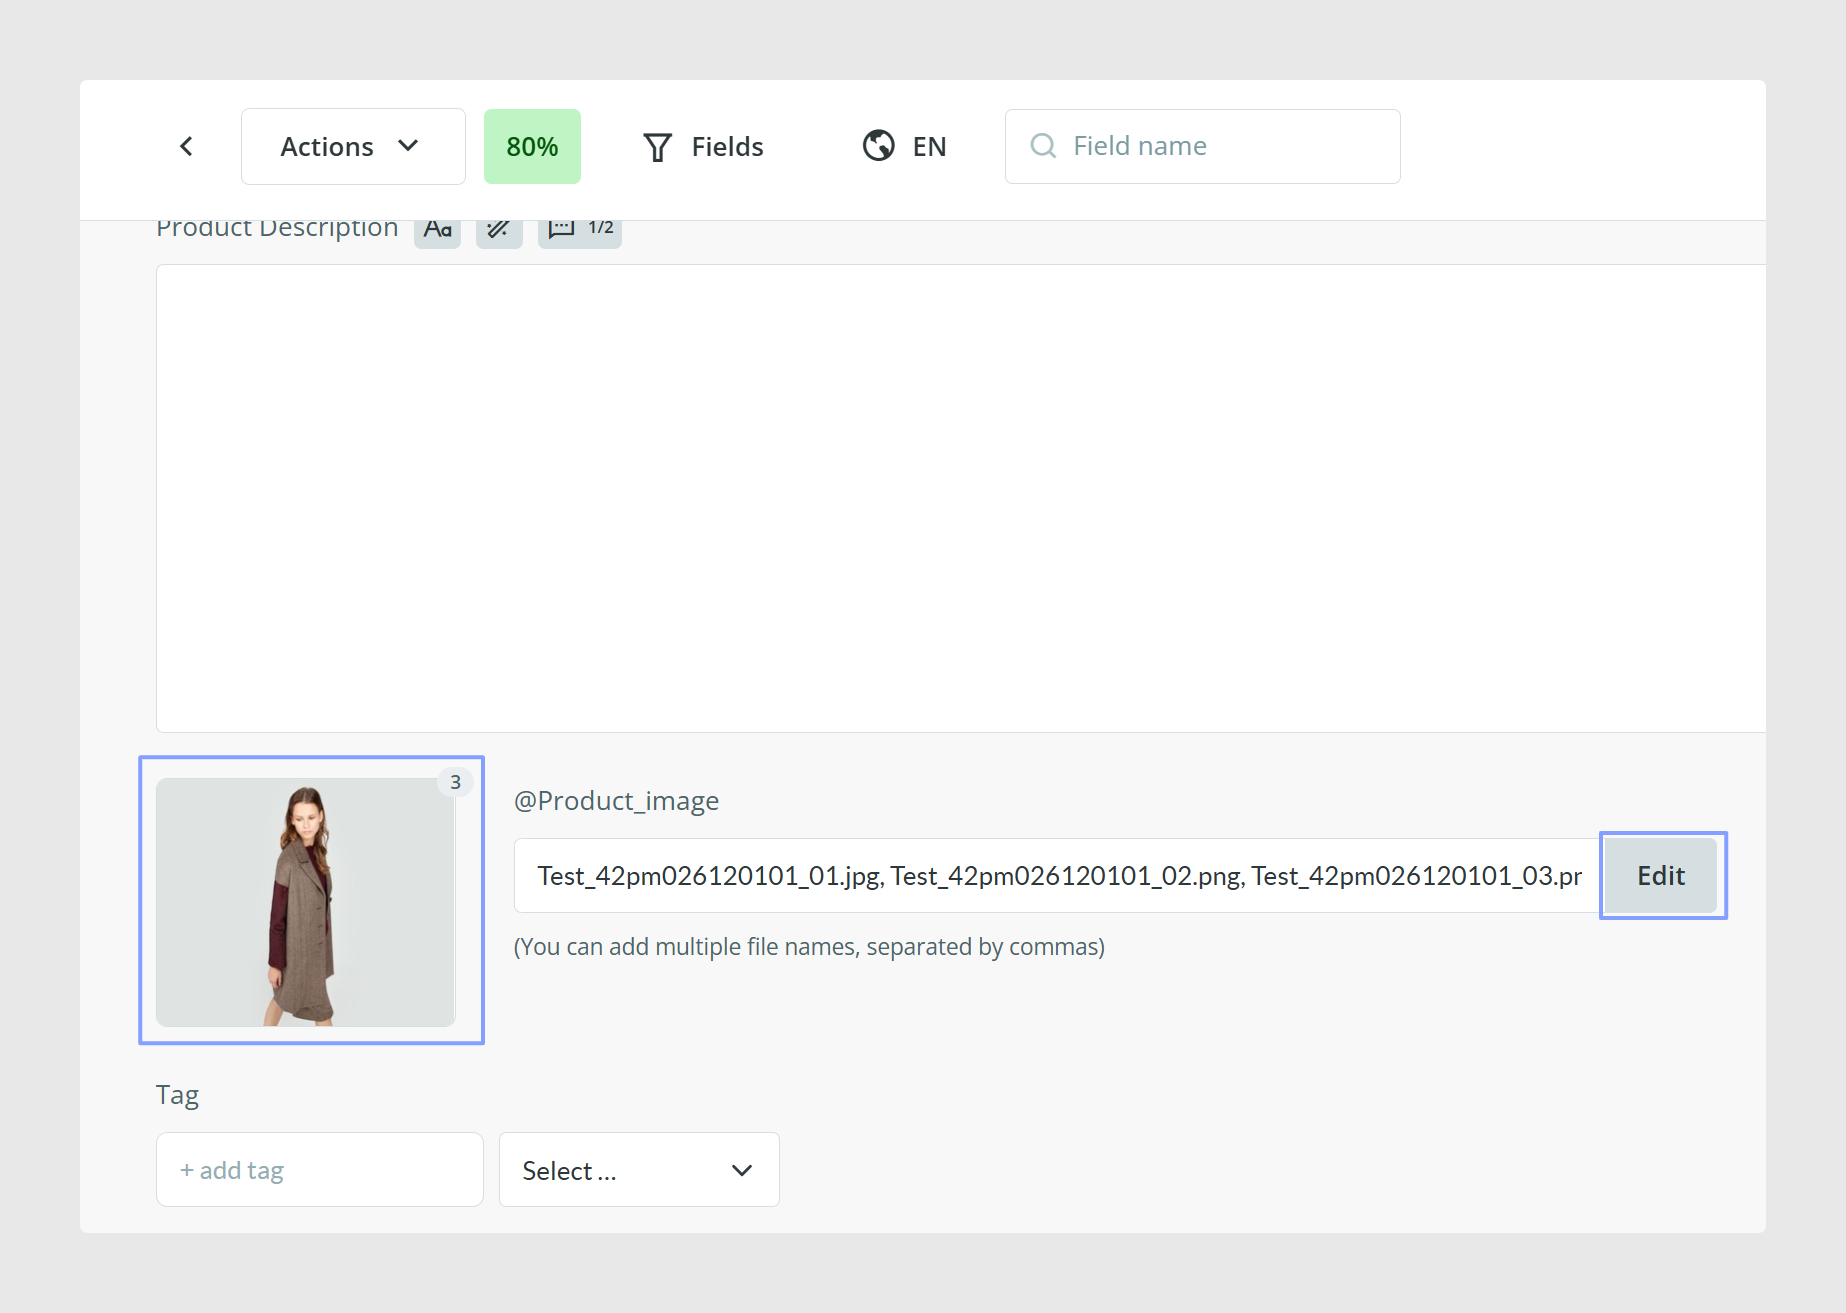
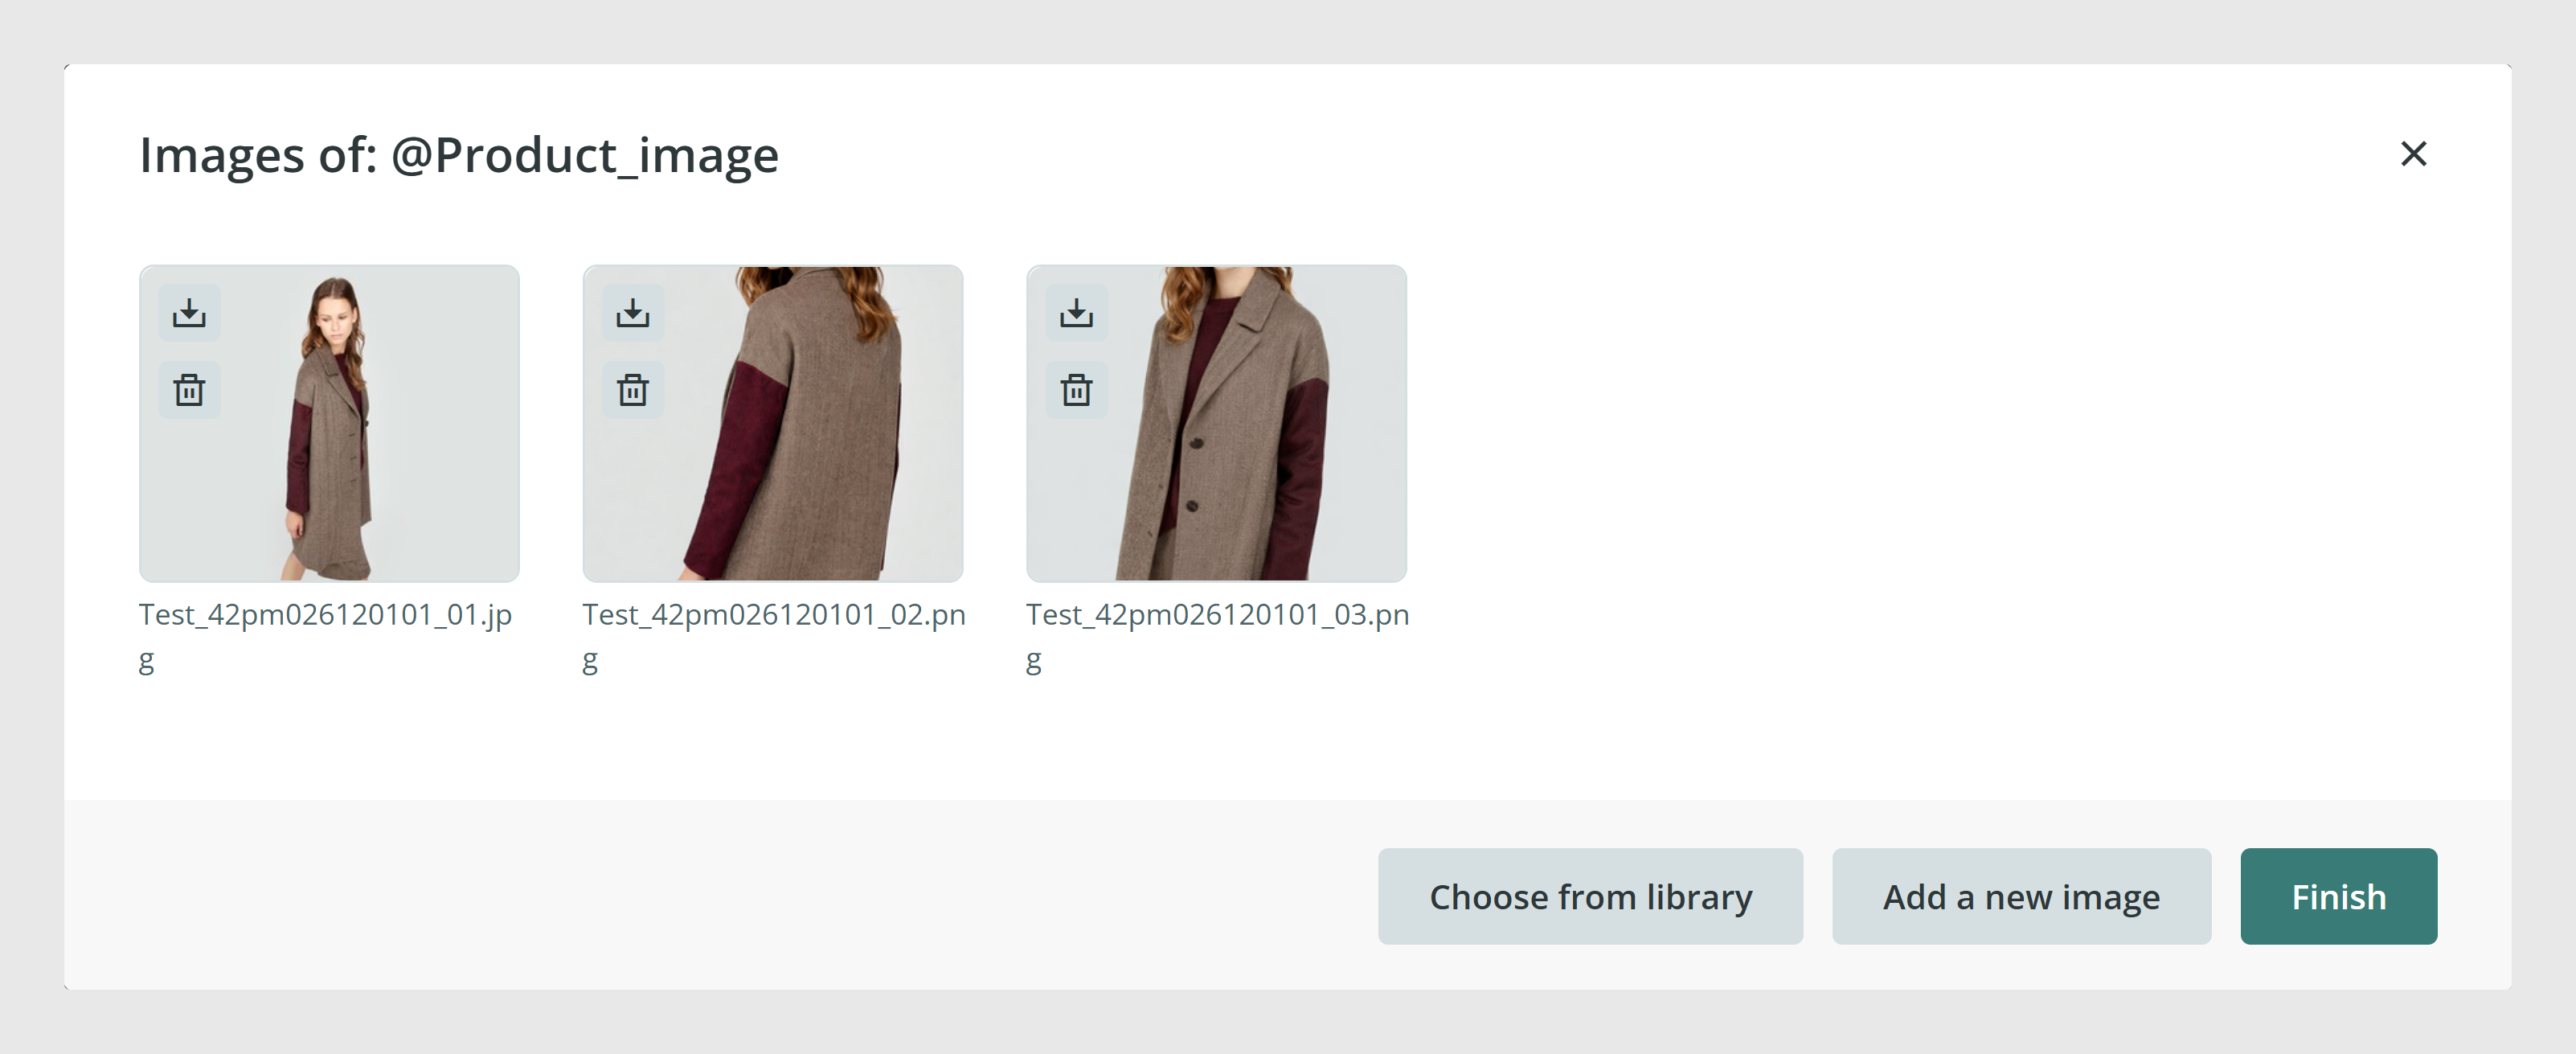
If you prefer, you can also upload images from the Images section and then link them to the product later.
If you need to add more than one image in the future, Sales Layer supports multiple images in image fields.
Tip: If you do not see an image field in the product form, the field may not be included in that form or attribute set. An admin may need to add it in the form editor.
30-minute checklist
- Imported 10 products successfully
- Created or confirmed categories exist
- Assigned categories to products
- Uploaded 1 image to a product
Common issues and quick fixes
I cannot see the Import option
You may not have permission to import products or categories. Ask an admin to review your user permissions.
I do not see an image field on the product
The image field may not be included in the current product form or attribute set. An admin can add it through the form editor.
Best practices
For your first workflow, keep the setup simple. Start with a small product file, a clear category structure, and one test image. Once you confirm that products import correctly, you can expand the structure, enrich more fields, and automate more of the process with confidence.
Was this article helpful?
That’s Great!
Thank you for your feedback
Sorry! We couldn't be helpful
Thank you for your feedback
Feedback sent
We appreciate your effort and will try to fix the article